Apache: Hosting a Resumé on a local Server
- By E. Ewusi-Essel

Introduction
In this guide I will demonstrate how I installed a running Apache server on Linux Ubuntu 22.04. A majority of the worlds servers are hosted on Apache HTTP servers and are mostly run on Linux machines. The reason it is popular is because of its versatility, its open-source and suitable for a wide range of web hosting needs.
In this post I will outline how to install Apache and host a simple html file of a sample resumé on the server.
For more information on Apache visit: https://www.apache.org/
Step 1 - Installation
Let’s start by updating the local package index to include the latest changes.

Now let’s install the Apache package with the following command:

Pro Tip: APT, which stands for Advanced Package Tool, is used in Linux for downloading, removing, and upgrading software packages.
Step 2 - Configuring Firewall
It’s important to adjust the firewall settings to permit external access to the default web ports. During installation, Apache registers itself with a UFW, creating several application profiles that allow us to enable or disable access to Apache through the firewall.
To view the list of UFW application profiles, use the command:

UFW or Uncomplicated Firewall, is an interface geared towards simplifying the process of configuring a firewall
As indicated by the output, three profiles are available for Apache:
- Apache: This profile opens only port 80 (normal, unencrypted web traffic)
- Apache Full: This profile opens both port 80 (normal, unencrypted web traffic) and port 443 (TLS/SSL encrypted traffic)
- Apache Secure: This profile opens only port 443 (TLS/SSL encrypted traffic)
- CUPS: is the primary mechanism in the Unix-like operating system for printing and print services. It allows a computer to act as a Print server.
It is advisable to enable the most restrictive profile that still permits the necessary traffic. Since SSL has not been configured for our server in this guide, I only need to allow traffic on port 80. Let us choose to allow Apache profile:

Lets check for our current UFW status, the output will provide a list of allowed HTTP traffic:
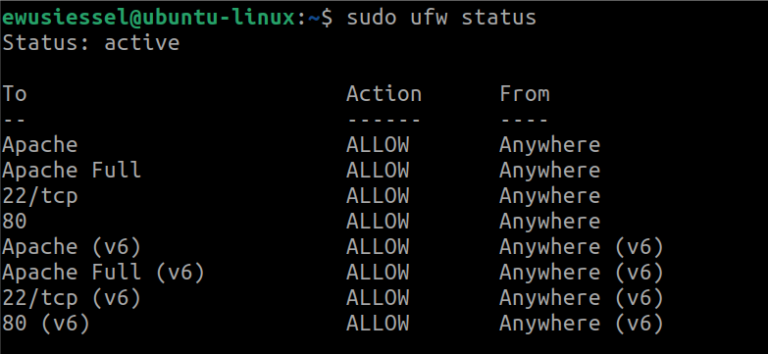
Troubleshoot: if firewall is indicated as inactive, enable with command: sudo ufw enable
Step 3. - Checking Server Status
To check server status, use the command:
sudo systemctl status apache2

Tip: To exit this output, press ‘Q’ on your keyboard.
There are indications that Apache is active and running correctly. Additionally, the output provides basic information about the locations of important Apache files and directories.
Step 4. -Managing Apache Processes
Now that you have your web server up and running, let’s go over some basic management commands using systemctl
4.1. To stop the server:
sudo systemctl stop apache2
4.2. To start the web server when it is stopped:
sudo systemctl start apache2
sudo /etc/init.d/apache2 start and sudo /etc/init.d/apache2 stop is the old method to start and stop the service respectively, these commands still work
4.3. To restart the service:
sudo systemctl restart apache2
4.4. When configuration changes are made. To enable Apache to reload without dropping connections:
sudo systemctl reload apache2
4.5. By default, Apache is configured to start automatically when the
server boots. If you do not want this, this behaviour can be disabled with the command:
sudo systemctl disable apache2
4.6. To re-enable the service to start up at boot, type:
sudo systemctl enable apache2
Step 5. - Network Verification Checks
We can perform a network verification using the following command:
netstat -a | more 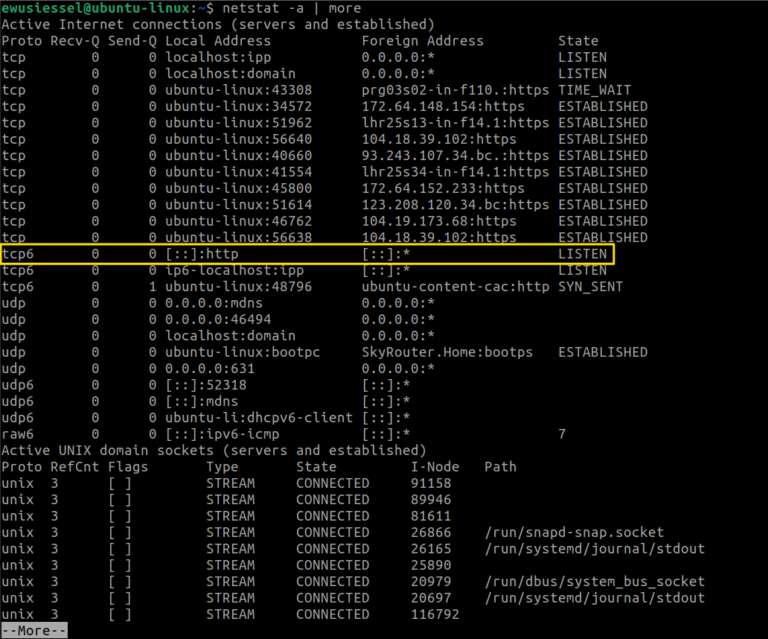
Tip: The command netst -an | more will provide a similar output (the ‘n’ stands for number).
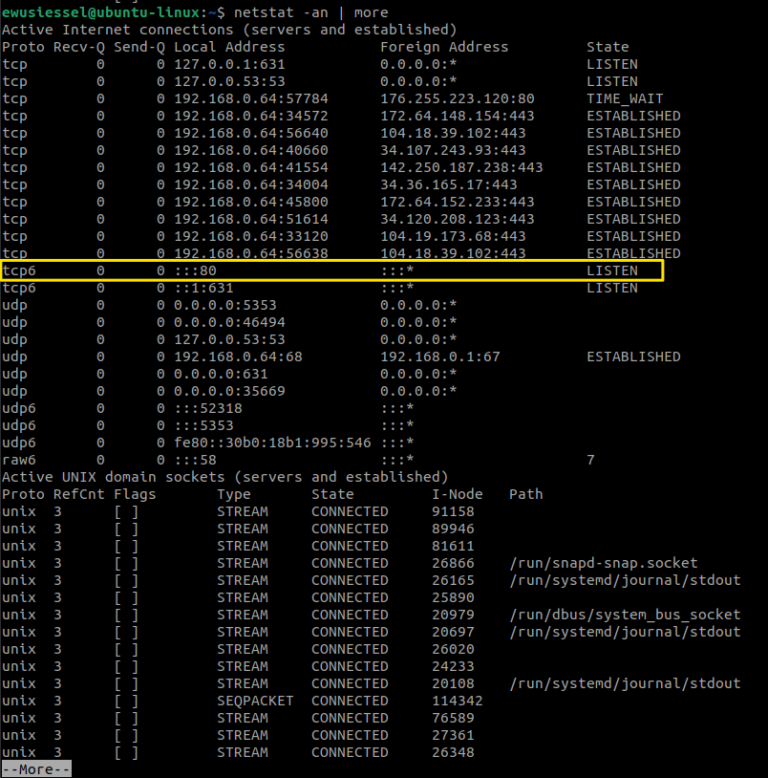
From the outputs, we can see that Apache is listening on localhost and on every available address for port 80, which is the standard HTTP port for web servers. This means it is ready to accept requests on all network interfaces.
Step 6. - Apache Default Page
There are three ways to check if the Apache server is working in your browser: by typing localhost, 127.0.0.1, or our IP address. This will display the Apache default page.
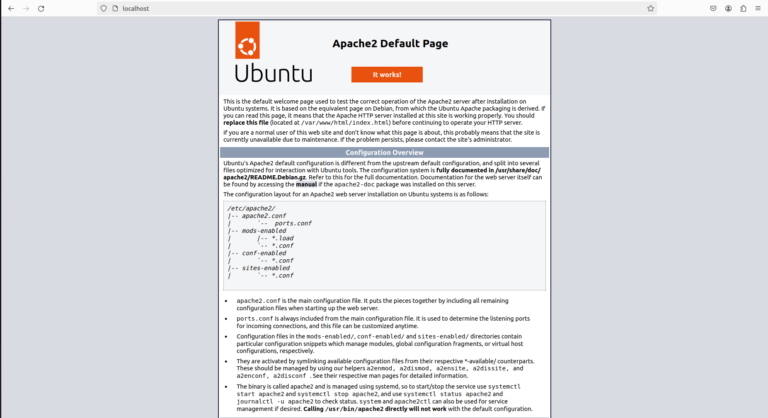
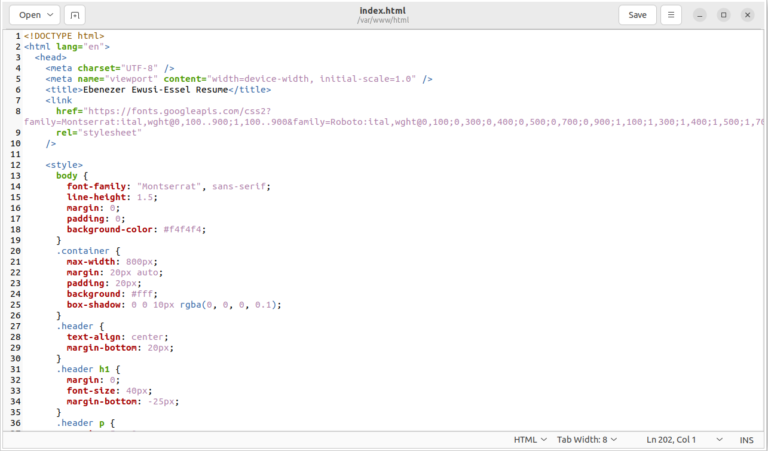
Our goal is to replace the default page. To access this file, navigate to the HTML directory and locate the index.html file. We use sudo ‘gedit index.html’ command to make edits.

Having previously used Visual Studio Code to write my resumé, simply replace the default code and save the changes
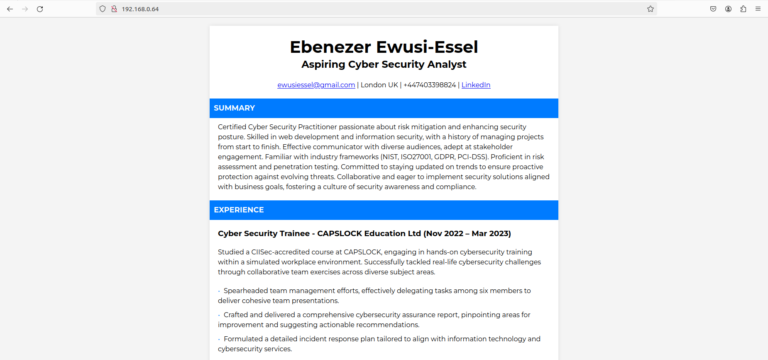
This time lets type our IP address into the browser instead. And there we have it – my resumé is live on my local server!
Tip: The command hostname -I can be used as an alternative to ifconfig to find your machine’s IP address.
I took an additional step and decided to connect to my local server using my mobile browser.

Conclusion
I found great satisfaction in doing this exercise. As evident from the process, it entails several fundamental steps. But by following the outlined procedures, anyone can start to grasp that setting up their own Apache server and hosting a basic webpage is an accessible and uncomplicated endeavour. With this approach and careful attention to detail, the process is straightforward and fulfilling.
